
Seven seeds of rye
With my new Scandinavian bread baking class coming up soon, the past few weeks have seen me tinkering with different combinations of flour (rye, spelt and barley malts to name a few) toasting and milling spices (pumpkin, sunflower, linseed, coriander, caraway, aniseed and fennel to name seven) and using scalds and soakers (more on that later) to create some very special flavours.

This lovely loaf was baked at last weeks sourdough class - I’ve had some lovely reviews. My sourdough classes continue to be very popular so I’ve added some more dates on the website. There’s a sourdough baking and pizza class in August and an additional sourdough baking class in October if you missed out before. Don’t hang about - they’re in demand!

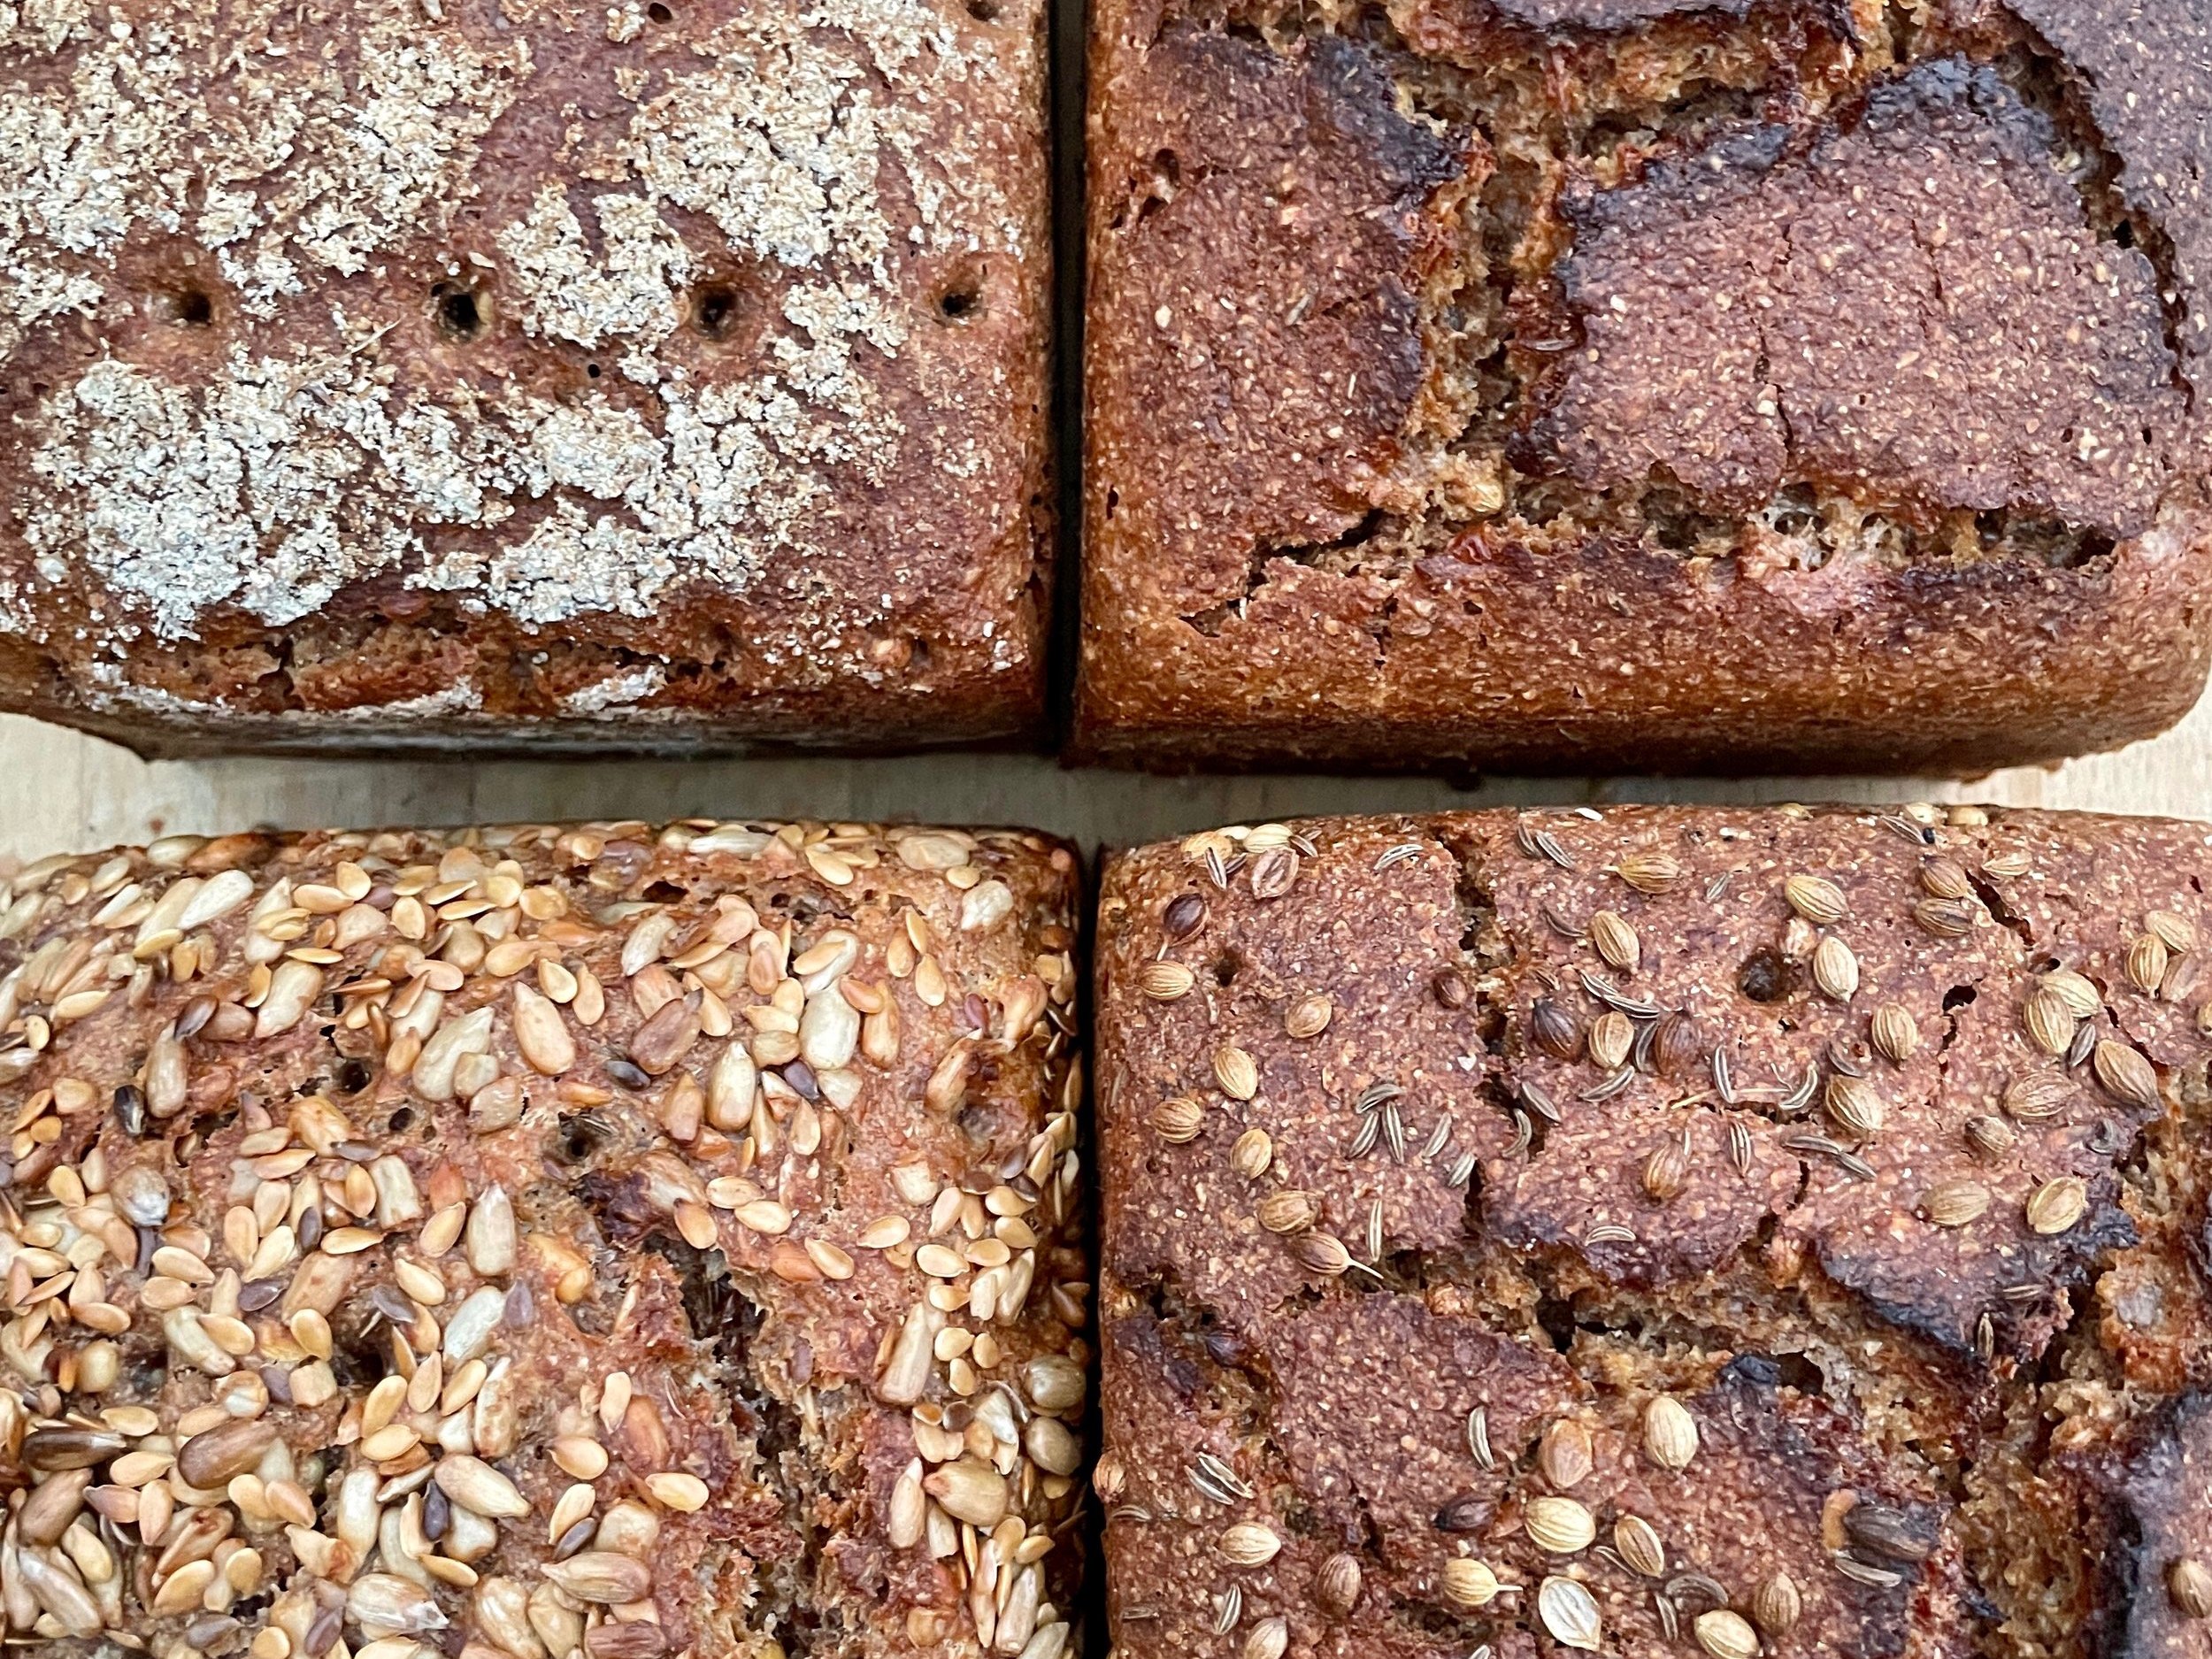
Seeded rye bread
Bread is such an important part of my life that admitting I have a favourite feels a little like confessing to having a favourite child(!) but if pushed I would probably choose a darkly complex, sweetly sour, dense and satisfying Scandinavian rye bread.
This traditional style sourdough bread is made with wholemeal rye, wheat and malt flour as well as coffee, honey, spices and seeds. There’s a lot going on!
Makes 2 small loaves, best eaten the day after baking.
Day 1, evening. Sourdough culture build.
75g active rye sourdough culture
250g dark (wholemeal) rye flour
250g warm water.
Combine all the ingredients together, cover and leave ambient overnight.
Day 1, evening. Coffee spice scald
50g dark malt flour (available from brewing shops)
75g dark rye flour
25g toasted caraway seed
25g toasted coriander seed
75g malt extract
300g strong hot coffee
Combine all the ingredients and leave ambient overnight.
Day 2, The next morning
500g dark rye flour (I used Hodmedods rye flour)
350g whole-wheat flour (I used Hodmedods YQ flour)
75g honey
50g neutral oil
25g fine sea salt
450g warm water (40°c)
To the sourdough culture and the scald add the above ingredients and mix to combine.Cover the bowl and allow to ferment in a warm place for approximately 4 hours until the surface looks slightly domed and you can see the start of small pinprick holes. Prepare 2 tins by greasing thoroughly and press your dough into the tins using wet hands - it should reach just over half way. I then sprinkled the surface of my dough with more seeds but using rye flour makes it easier to tell when your loaf is ready for baking. You can dock the loaf if you like the way it looks - see my photo.
Allow to prove in the tins for a couple of hours until the flour surface becomes cracked and you can see those pin prick holes again. Bake in a hot oven (230°c) for 40-50 minutes. Test the internal temperature with a digital thermometer - it should read 97°c.
Allow to cool on a wire rack and wait till the following day to enjoy!

A
All the gear. What’s useful (and what’s not).
Digital thermometers
Maintaining the ‘right’ temperature isn’t just important for humans – it also makes a massive difference to the yeasts that are powering your bread. I bake with two types of yeast: wild yeast, also known as sourdough, and baker’s yeast - the manufactured dried granules you buy in the supermarket. Both types of yeast are single cell organisms which needs food, moisture, and warmth to thrive. The food and moisture requirements are relatively straightforward– delivered in the form of the starches and sugars in the flour you make your bread with, and water to moisten the flour to make a dough but the last ‘need’ (warmth) requires a little more focused attention. If your dough (and therefore your yeast) gets too warm whilst it's proving it’s difficult to control and can easily overprove - essentially the yeasts run out of food and your dough pancakes…
Conversely if your dough is too cool during proving it takes forever for the yeasts to become active, your dough barely rises and your bread bakes like a brick! If this sounds familiar, treat yourself to a digital thermometer – your ideal dough temperature should be 25°c. If you'd like to learn more about how to achieve and manage that ‘desired dough temperature’ (or DDT as we call it in the baking world) join me on a baking class, I’d love to share my knowledge with you!
Baking know how:

Enriched dough
At its simplest, bread can be made from just flour, water, yeast and a dash of salt - known as ‘lean’ in the baking world. It tastes great because what you can taste is the (good) grain and the flavours of fermentation – especially if that fermentation is long, as in the case of sourdough bread. However, sometimes we all crave a little more from our bread and that’s where ‘enriching’ comes in. It's a formal term for adding ingredients such as milk, butter and eggs. What we’re adding to the dough is sweetness and fat (and deliciousness, of course, that goes without saying). As a bonus, not only do these ingredients make our bread taste great they also stop it staling as quickly.
Some things to bear in mind if you're working with an enriched dough recipe:
If your recipe calls for a high proportion of fat its best to add it after the gluten protein strands in your dough have had a chance to bond, making it strong and stretchy. Added too early, the fat coats the flour molecules and makes it tricky for the dough to form.
Recipes with a high sugar content tend to prove more slowly because of sugars hydroscopic properties. Sugar molecules pull moisture away from the flour (and yeast) making it harder, therefore slower, for the yeast to feed and ferment your dough.
Bakes with a high sugar and fat content will darken more quickly on the surface. Keep an eye on them towards the end of the bake and cover if neccessary with a silicone mat or tinfoil towards the end of the bake.
What I’m listening to:
Gastropod , described by its American authors as ‘food with a side of science and history’, answers questions like ‘why are those diminutive bottles of balsamic vinegar in the supermarket so expensive, what makes someone a supertaster and are bakers 99% yeast?? That last one was a slight exaggeration but the sourdough episode is fascinating! With an impressive back catalogue going back years this podcast comes highly recommended if your idea of heaven is getting your food geek on for a quiet couple of hours.

What I’m reading
What makes a ‘National Dish’ is the question posed by the author Anya Von Bremzen . I’d pose another question - is it good to read about pizza in bed? This book has made me hungry at some strange times of the day!
Looking at the world through the lens of food, Anya von Bremzen’s book “National Dish’ explores six of the worlds fascinating and iconic culinary cultures. Covering France, Italy, Japan, Spain, Mexico, and Turkey it brilliantly weaves cuisine, history, and politics around the stories of how these dishes came to symbolise a nation. Highly recommended, though maybe not at bedtime.
Upcoming classes
17th February - French baking
19th February - Scandinavian bread baking
9th March - Advanced sourdough baking
23rd March & 26th March - Easter baking
12th April - European baking