
Crispbreads and fancy rolling pins.
I’m really pleased to be able to tell you that 2024 baking classes are being snapped up on ‘The Next Loaf’ website - my heart does a small leap with joy every time my inbox pings to tell me that ‘a new order has arrived’. Thank you if you’ve booked, and if you haven’t yet, don’t hang about (there’s only 6 places per class!)


Prune & pink peppercorn crispbread
This month I’ve been thinking about edible Christmas presents that are quick and easy to make and won’t break the bank. Granted it’ll be a hard sell convincing a small child that this months recipe wins over the latest ‘must have’, but I find most people are delighted to receive something thoughtfully handmade. These crispbread are the perfect vehicle for moving runaway brie to a waiting mouth whilst watching reruns of Strictly and Morecambe and Wise.
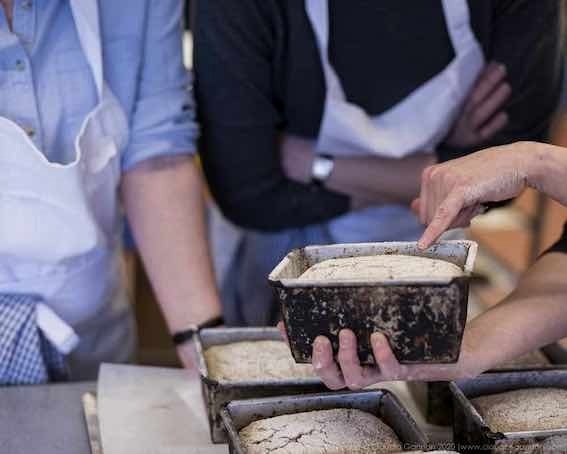
Photo credit: India Hobson
Makes 12 medium or 6 extra large
Prep time: 30 minutes
Bake 25-35 mins
Day 1
1tsp pink peppercorns
40g soft prunes
5g flaky sea salt
160g dark rye flour
100g strong white bread flour
150g wheat to rye sourdough culture (leave out if you don’t make sourdough - the flavour won’t be quite as strong and you might need to adjust the quantity of flour)
120g cold water
On a chopping board, use the side of a sharp kitchen knife to crush and flatten the peppercorns. Chop or blend the prunes into a paste with the sea salt and combine with the peppercorns. make sure no pieces are larger than 1mm or you won’t be able to roll your crackers thinly.
Combine the prune paste with the remaining ingredients in a bowl and mix until no dry bits remain.The dough will be quite stiff but will soften slightly overnight as the sourdough ferments. Cover and refrigerate for 12-16 hours.
Day 2: line a couple of baking sheets with baking parchment and preheat your oven to 180°centigrade, gas mark 6. Divide the dough into 12 pieces (or 6 for large sharing crackers) and form into balls. Use dark rye flour as your dusting flour. Keep turning the dough as you roll to create a disc approx 1-2mm thick. You can cut out the centre using a small round cutter or a bottle top screw cap.
Use a pastry docker or the tines of a fork to press deep holes into your dough - this will stop it puffing up as it bakes. Lay each circle onto the lined baking sheet, they won’t spread so can be quite close together. Bake for approx. 10 minutes then turn over and bake for n5-10 minutes until crisp and lightly browned. Slide the crispbread off the baking sheets onto the metal racks of the oven and turn the oven temperature down to 120°c then continue to bake for another 10-15 minutes before turning off the oven and leaving the crispbread to cool in the (turned off) oven with the oven door slightly ajar.
Store in an airtight container until just before you’re ready to give your gift to keep them crisp.

A
All the gear. What’s useful (and what’s not).
Rolling pins
The first Two Magpies shop in Southwold sported a selection of vintage rolling pins which I bought on ebay. They were painted white with red handles and we used them as coat hooks. A few months later, with the bakery up and running, I bought a ‘dough sheeter’. Beloved by bakers and pastry chefs, the sheeter mechanically flattens dough as it's fed between two metal rollers, like an old-fashioned laundry mangle. Fast forward a few years and I’m mainly baking in my home kitchen so I’ve come to appreciate the joy of a good rolling pin. Until recently my go-to was a “French” rolling pin - essentially a long wooden dowel that comes in various thicknesses but recently I’ve upped my game with 2 new ‘pin’ additions. The first is a beechwood beauty with red handles, ball bearings and a weight of over 2kg. It gives a consistent roll with much less effort - highly recommended! It came from Isenberg1750 in Germany and was recommended by a fellow baker via instagram. My second recent pin purchase has a starring roll (geddit!) in this months Scandinavian style crispbread recipe. Known in Sweden as a ‘kruskavel’ it’s perfect for making those little divets in your dough to give an authentic look (a fork will suffice but it really is a thing of beauty…)

Ingredient know-how
Baking ingredients can be confusing. Take sugar for example - it comes in brown, white, golden, light, dark, icing, demerara, muscovado……. I could go on.
Continuing my ingredient deep dive I’m looking at some of the basics you might have in your cupboard or be reaching for in the supermarket. One of the (many) things I love about baking is that once you have understanding and knowledge THEN you can start to get sassy and bend the rules!
*a caveat here would be that sometimes mistakes,can result in new ideas. I remember a weary bakery shift where I melted butter in the microwave, intending to add it to a cake mix. The bowl of (now re-solidified) butter was found many hours later - long after the cake went in, and came out of, the oven. Despite this oversight the cake was deemed a success (and dairy free into the bargain). A new recipe was born….
Gluten free flour.
Last month we looked at bread flour and how high protein levels, AKA gluten, make it ‘strong’. Gluten, however, isn’t actually something we generally want or need in cakes and cookies. If you’ve ever accidently baked a chewy cake or a tough muffin (or been the unlucky recipient of said item) it's probably because over mixing developed the gluten in the cake batter. Nowadays It's relatively easy to buy gluten free flour mixes, from company’s such as Doves farm. If a cake recipe calls for plain flour you can generally make a direct substitute. Gluten free cake flours are typically made from a mix of starches (such as potato and tapioca) and proteins (such as rice and sorghum flour). Gluten free bread flour usually has the addition of Xanthan gum, a naturally produced binder that gives some elasticity and stretch to your proving dough though your finished loaf will have a different texture than bread developed with wheat flour.
You can also make cakes and cookies with naturally gluten free ingredients such as ground almonds (usually called almond flour in American recipes), polenta, buckwheat flour, cocoa powder, oat flour or cornflour - some more starchy than others. Almond flour will give your cake a slightly grainy, dense structure - perfect for a moist whole orange cake - wheres cornflour creates a smoother, fudgy texture. remember the flour is literally the supporting act to your raising agents (eggs, baking powder etc), flavour inclusions and sweeteners (sugar, honey etc).
If you have any requests for future ingredient deep-dives and other baking conundrums let me know and I’ll do my best to shed some light…
What I’m listening to:
One of my favourite podcasts is Farmerama. The name might have you thinking you need to be a fully paid up member of the tractor club but its not just for farmers, its for anyone who loves food and cares about where it comes from.
In October Kimberley Bell (@smallfoodbakery) and Ruth Levine (@leveneruth) recorded a series of wonderful episodes called ‘Good Bread - parts 1, 2 and 3’ and I cant recommend it highly enough - check it out.
What I’m reading:
You may have heard of Sophie Grigson – she’s often on TV, cooking up something delicious whilst strolling through the French countryside (well, not literally, but you know what I mean) but have you heard of Jane Grigson, her mum?
Jane Grigson wrote a series of books in the late 1970’s that have always earned their place on my bookshelves. With straight forward titles such as ‘Fruit’ and ‘Vegetables’ the start of each chapter gives you a great backstory to the ingredient in question before drawing you in to a wealth of options. Perfect if you have a glut of something or a challenging item in your weekly veg box!
One final word…..have you signed up for my newsletter? It’ll keep you up to date on new baking classes and let you know every time I post a new recipe here..
See you soon!